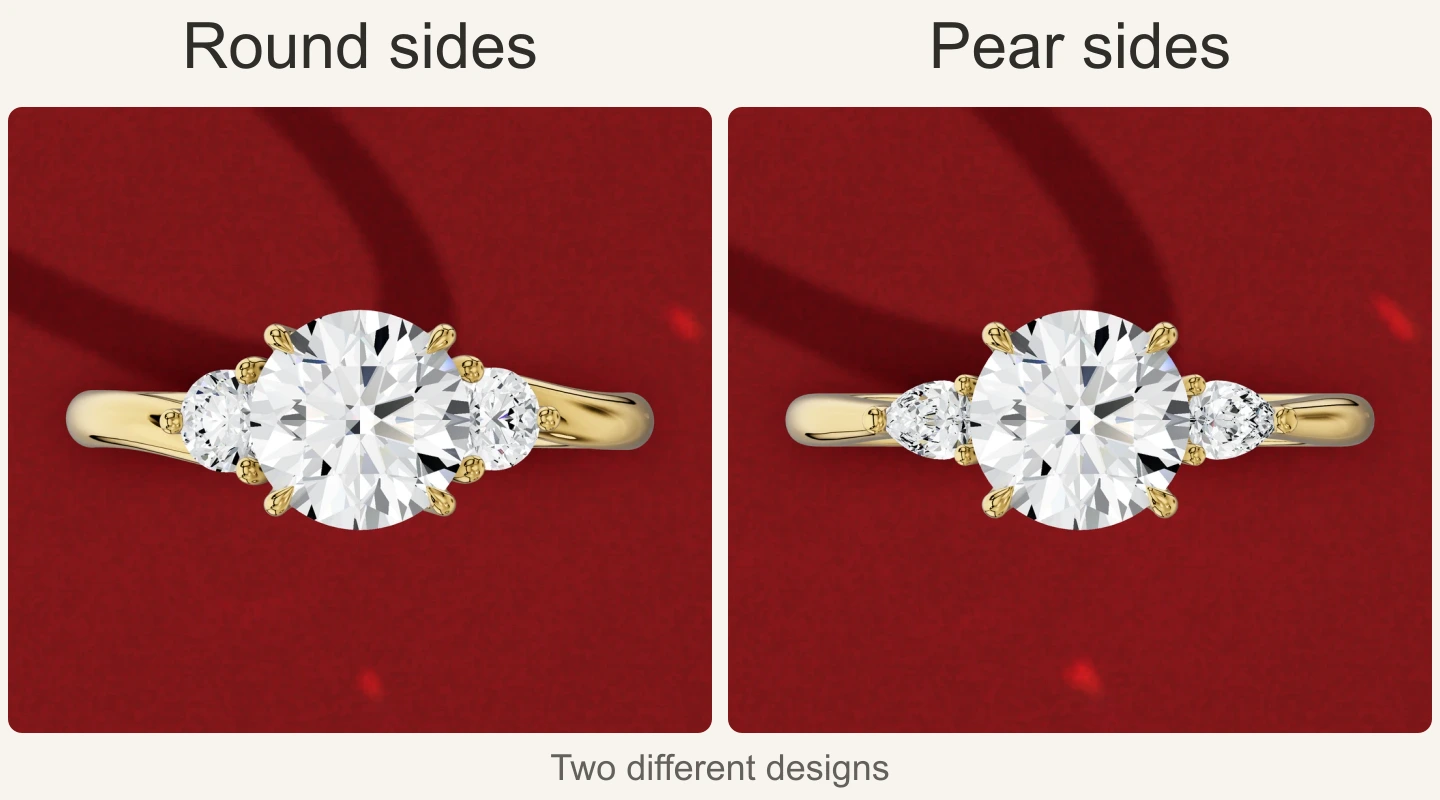

Round side stones repeat the centre diamond's circular outline. Pear side stones introduce a rounded end and a point, giving the sides a direction. If you like a round centre but cannot decide how to frame it, start with that difference before comparing the whole ring.
The two designs below show what to look for: the outline of each side stone, the space between the stones and the way the trio meets the band.
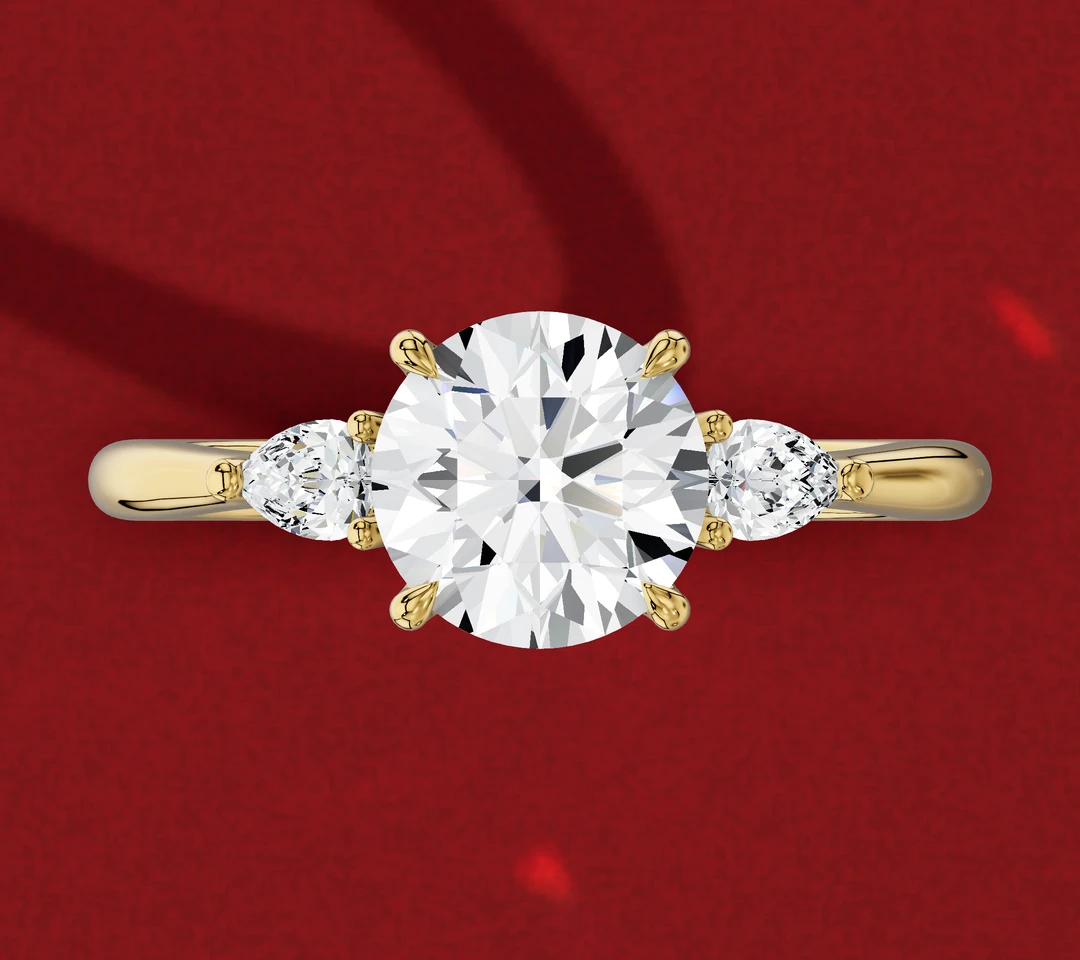
Follow the edge of the stones
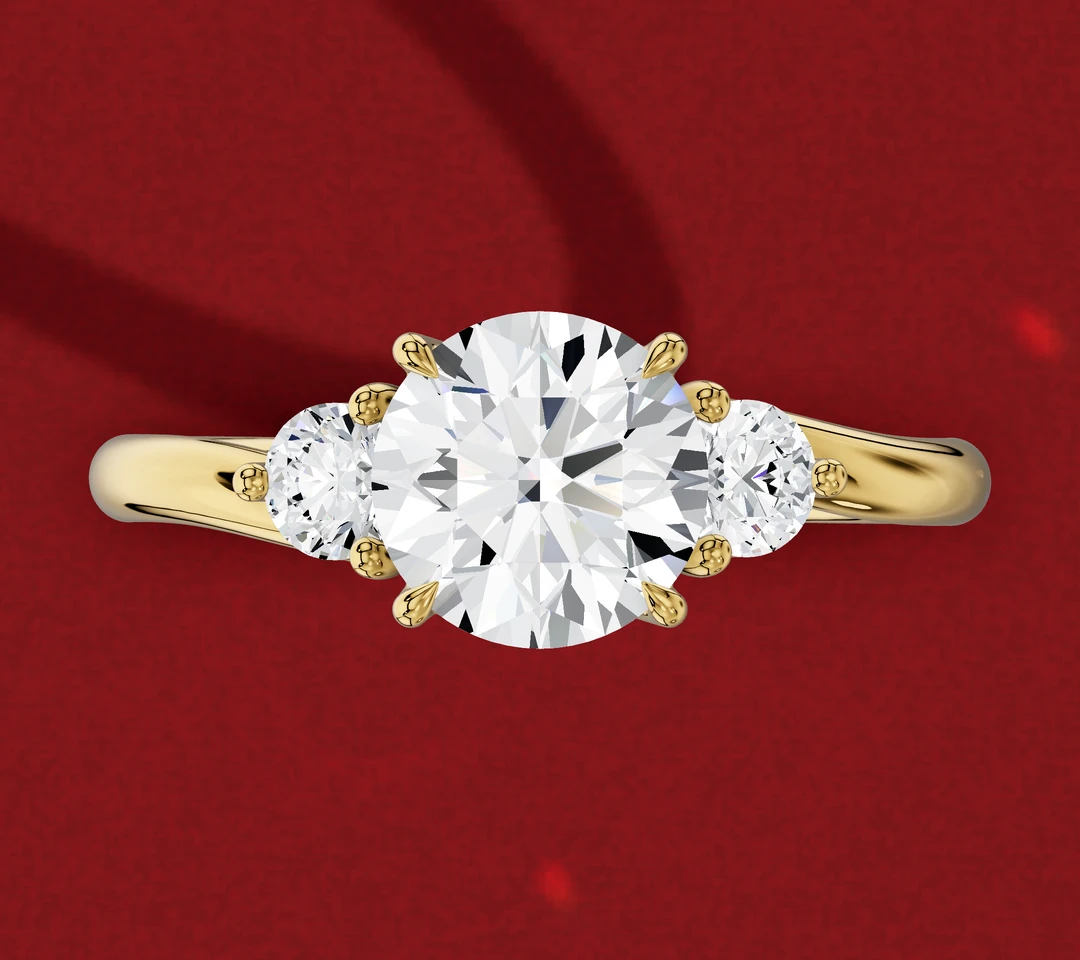
Start at the outside of one side stone and follow its edge towards the centre. Ignore the reflections inside it for a moment.
With round sides, the outline repeats a circle on either side of the larger circle in the middle. Look at the curved shoulders of each small stone and the indent between it and the centre. Do you like seeing three distinct rounded shapes?
A pear has a rounded end that narrows to a point, as described in GIA's research on fancy diamond shapes. In the pear-side example shown here, the rounded ends sit towards the centre and the tips lead towards the band. Trace that direction separately on both sides. Other designs can reverse the points.
The choice is about the line you enjoy looking at. Repeated circles and a directional pear outline can both work with a round centre. Neither tells you how large the side stones need to be.
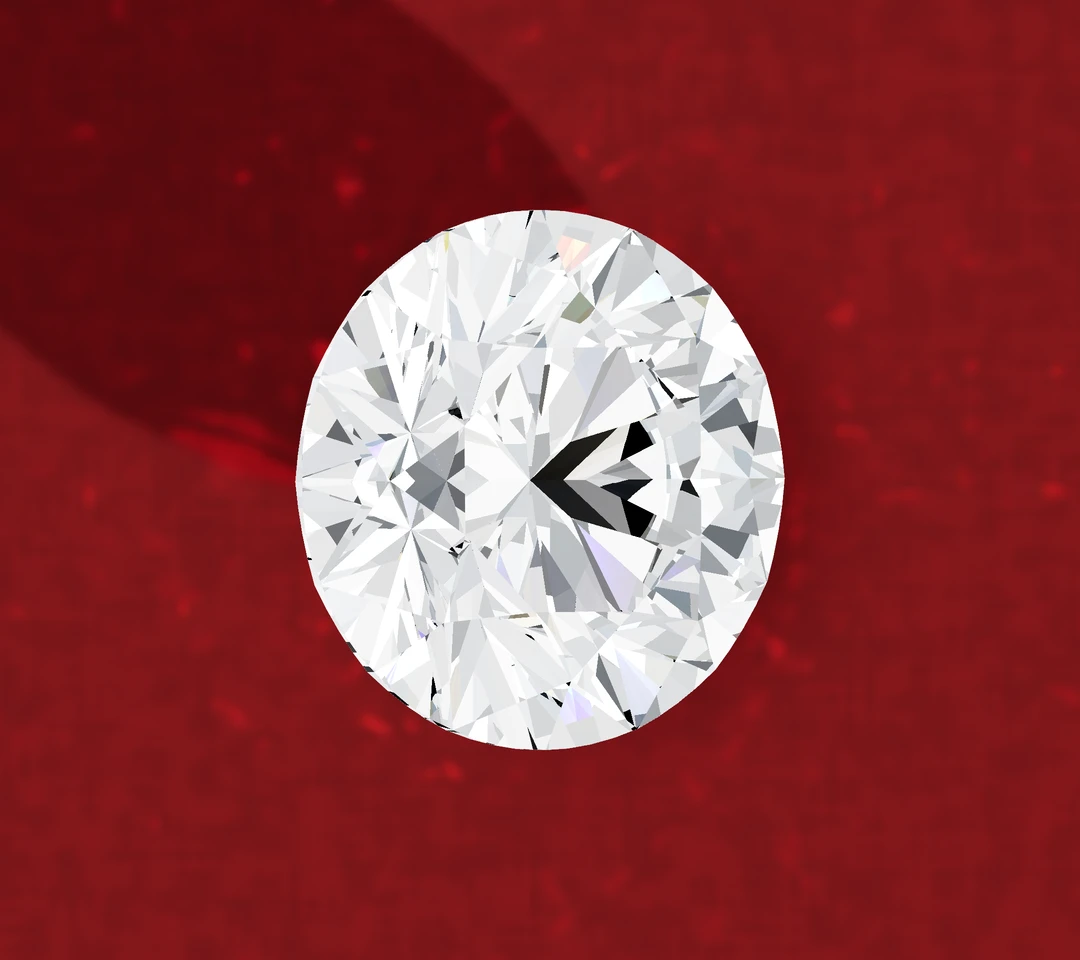
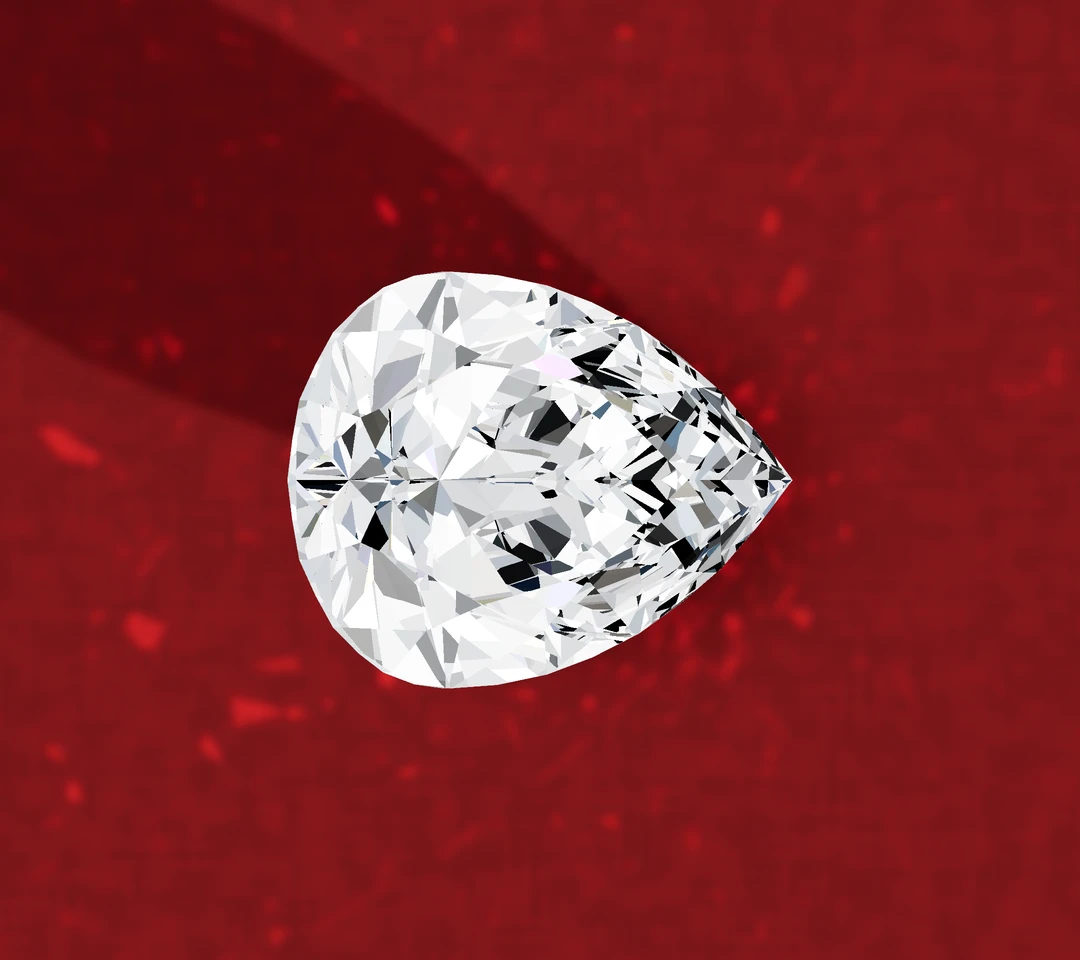
Point towards band
Separate shape from size
Two rings can both have round centres and pear sides yet look quite different. One might have short, broad pears; another might have longer, narrower ones. The size of the sides relative to the centre also changes how much of the outline belongs to each stone.
Compare these three features in an overhead image:
- How wide each side stone looks beside the centre
- How far the side stones extend towards the band
- Whether you can clearly follow the boundary of each stone
Carat weight alone does not answer those questions. It measures weight, while a diamond's dimensions describe its size. GIA explains that distinction and shows where both appear on a grading report.
For a design discussion, ask for the centre's dimensions and the length and width of each proposed side stone. Then compare the actual layout. A fixed percentage of the centre's carat weight cannot describe every combination of outline, spacing and angle.
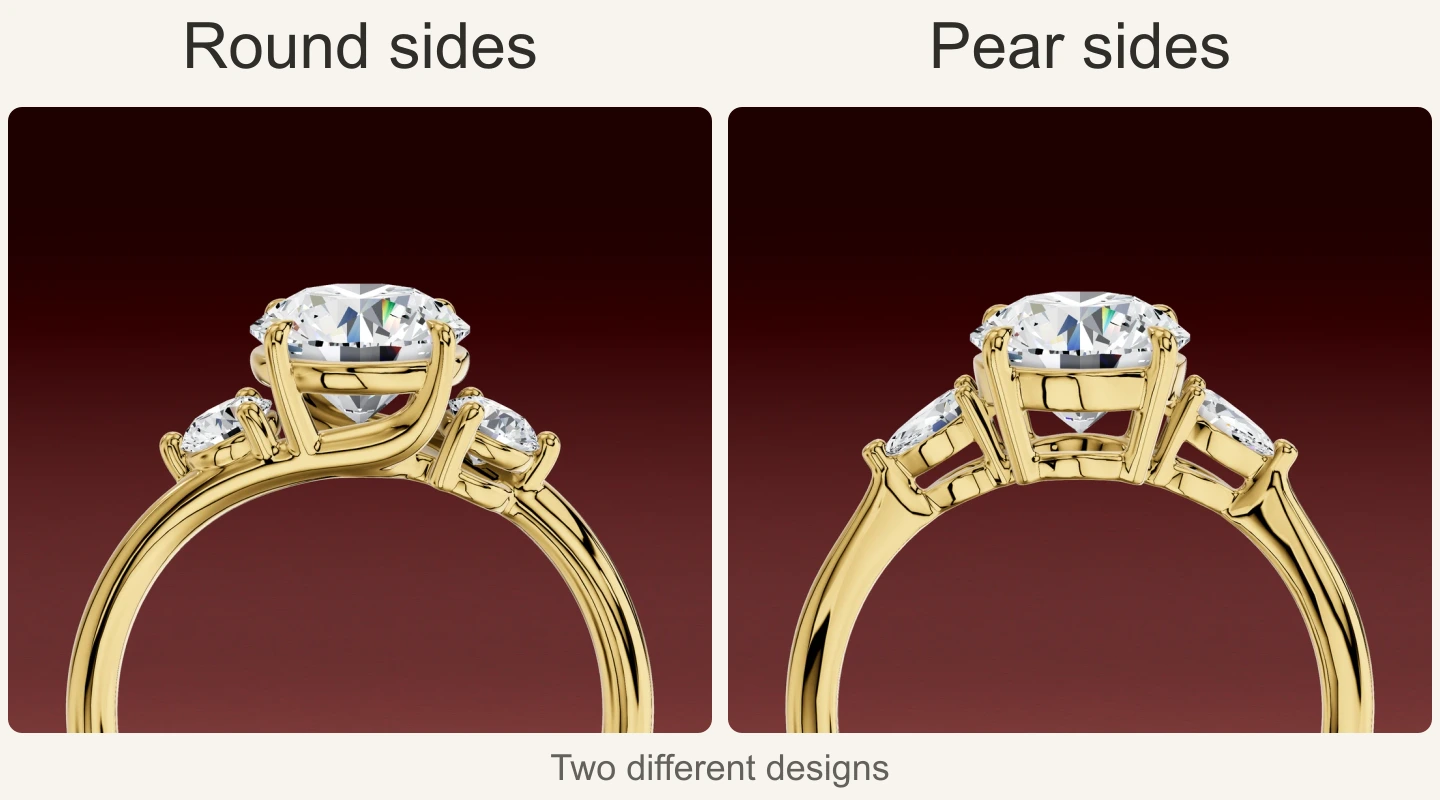
Turn the ring to see how the sides sit
A top view gives you the pattern. A view through the finger opening shows how the three stones are arranged above the band.
Find the top surface of each side stone. Is it level with the centre, lower, or tilted away from it? Now look back at the overhead view. A tilted stone presents a different projected outline from one viewed straight down its own axis, so a narrow-looking side in a ring image is not necessarily a narrow loose stone.
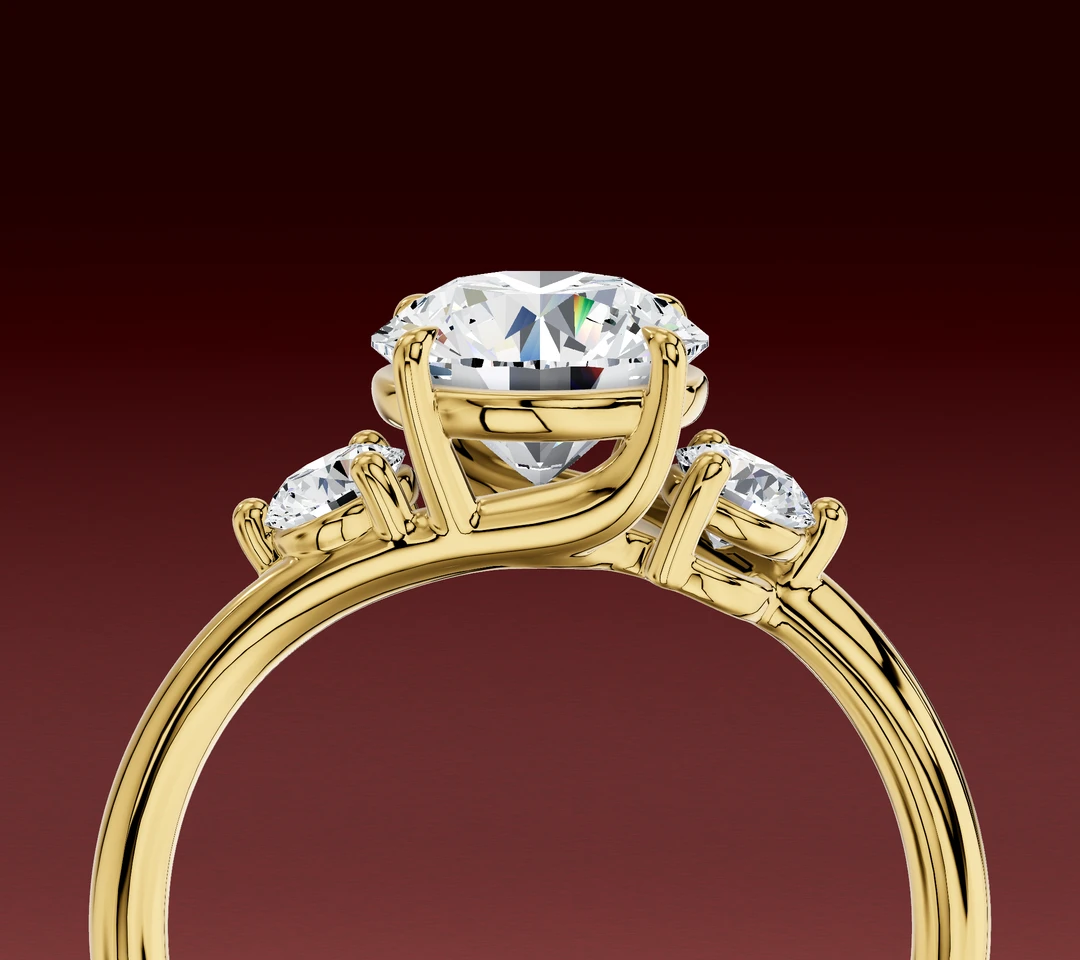
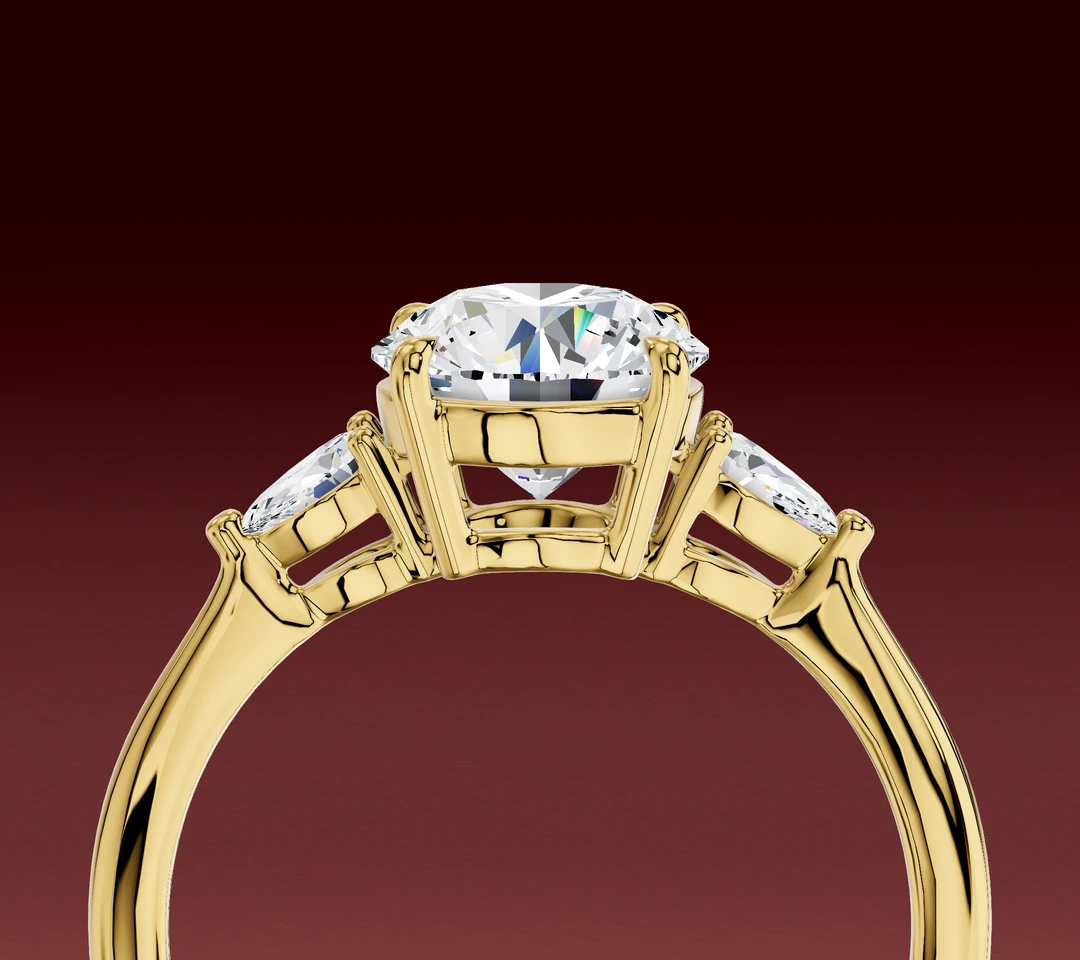
View the profile comparison at full size.
This is also where the metalwork becomes easier to distinguish. Look for the prongs around each side stone and the band beneath it. A tip of metal can interrupt the outline in an overhead image, which is why it helps to check more than one view before deciding that you dislike a particular stone shape.
Put your preference into words
A useful design note describes the part you like and the part you want to compare:
"I like the repeated circles of round sides. Could I see a version where the centre is more prominent?"
Or:
"I like pear sides with their points towards the band. Could you show me the proposed pair from above and through the finger opening, with their dimensions?"
Those requests give a designer more to work with than "make it more balanced". You can keep the centre shape you love while discussing the side-stone outline and proportions separately.
GIA's setting guide describes three-stone designs with matching or contrasting side stones. Start with the arrangement that appeals to you, then review the particular stones and setting together.
Explore three-stone engagement rings, or contact Lily Dia online with the side-stone shape and outline you prefer.
Designed by us in Melbourne, made to order
Lily Dia is a small studio, so every ring is drawn, set and finished for the person wearing it. If this article helped, the collection shows how these choices look on real rings, and you can ask us anything before you decide.
Browse engagement ringsOr ask us a question first