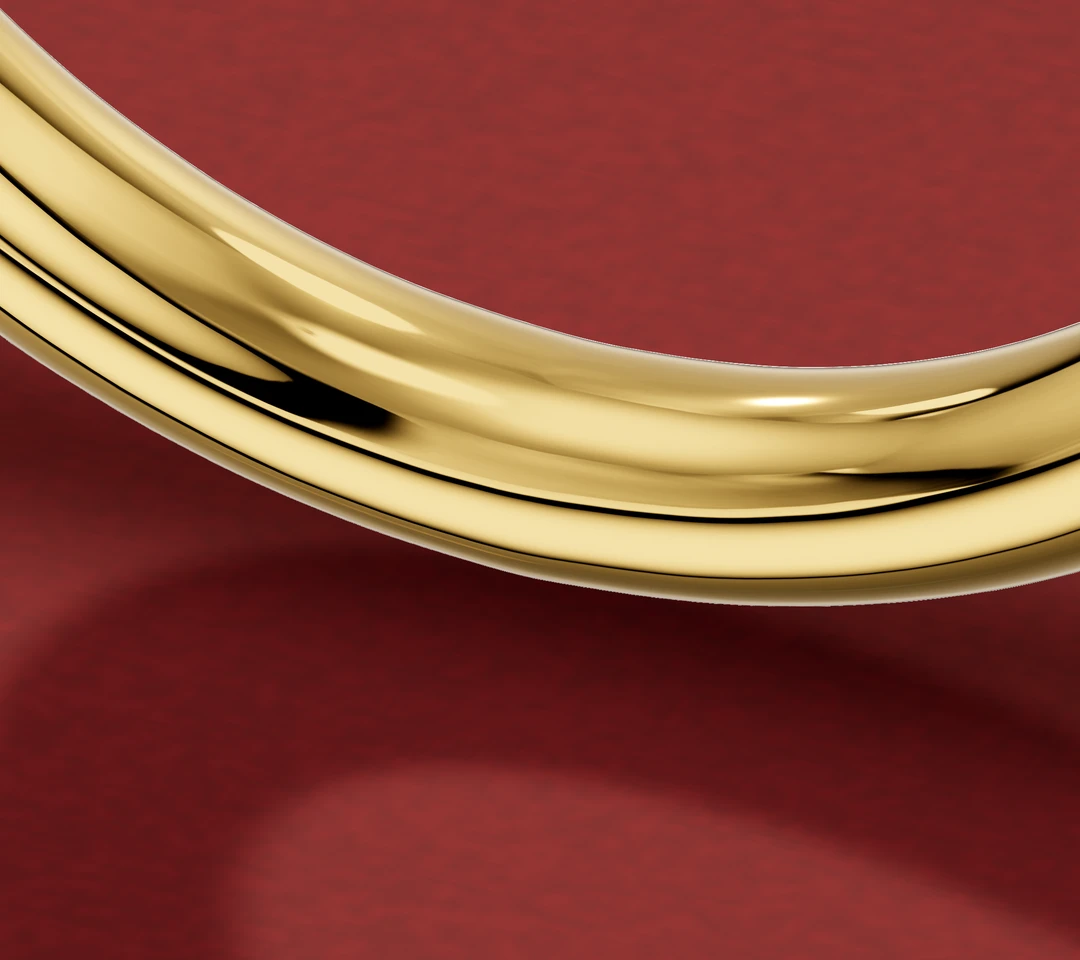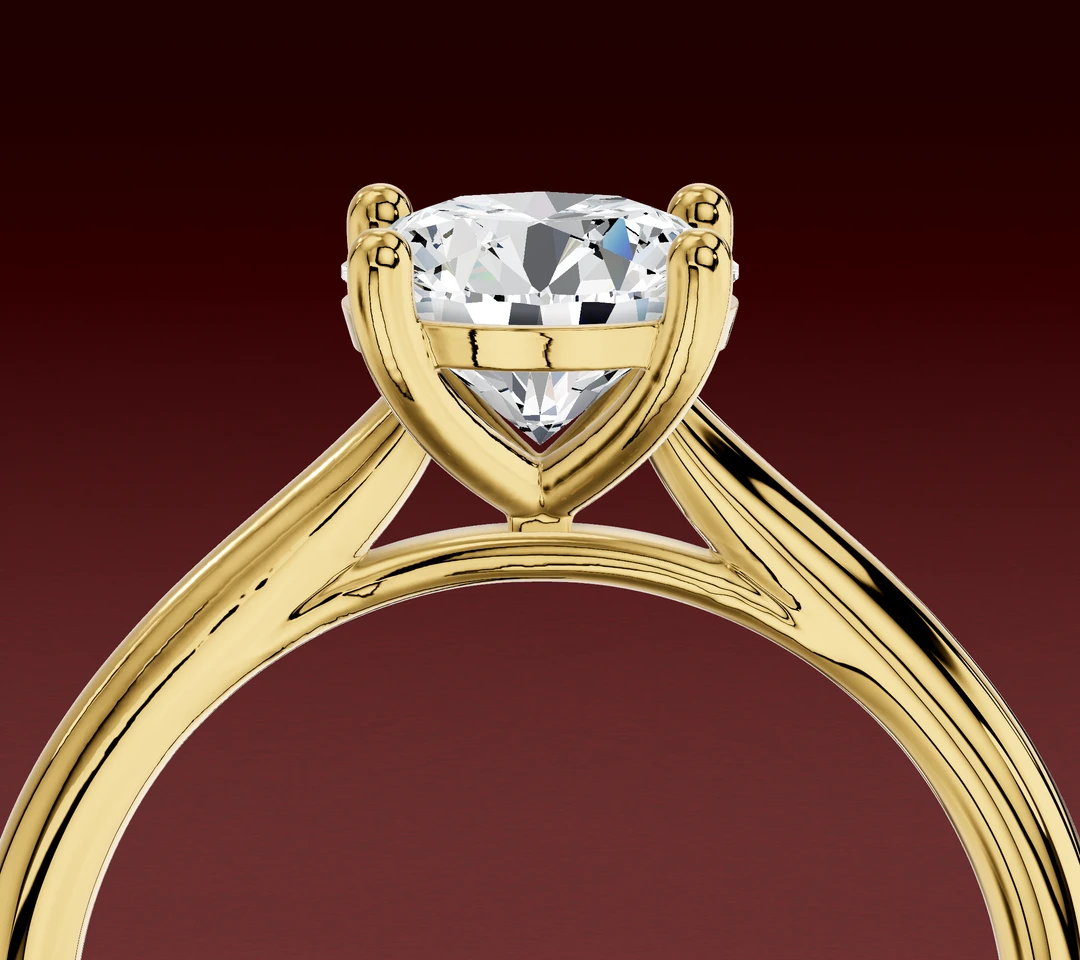

Start with the outline you want, then turn the ring and check where that outline comes from. A band that looks fine from above can have a much fuller side profile. A detail beneath the stone may disappear completely in the first image you open.
A useful CAD review connects each concern to a particular view and a written measurement. You do not need to learn jewellery software to do that.
CAD means computer-aided design. The model describes the ring's three-dimensional form; a render is an image made from that model. GIA explains how designers use CAD to rotate, revise and present jewellery. Here, one example ring appears from several directions so you can practise reading the views.
Follow one feature through the views
Choose a feature to follow first: the band as it approaches the centre stone. Those upper sections are the shoulders. The head is the part holding the stone, and the shank is the band around the finger. GIA's setting guide explains these terms.
From above: what is the outline?
Look straight down at the stone. Follow each shoulder towards it. Does the band keep the same width, narrow towards the centre, or spread into separate arms? How much metal can you see beside the stone?
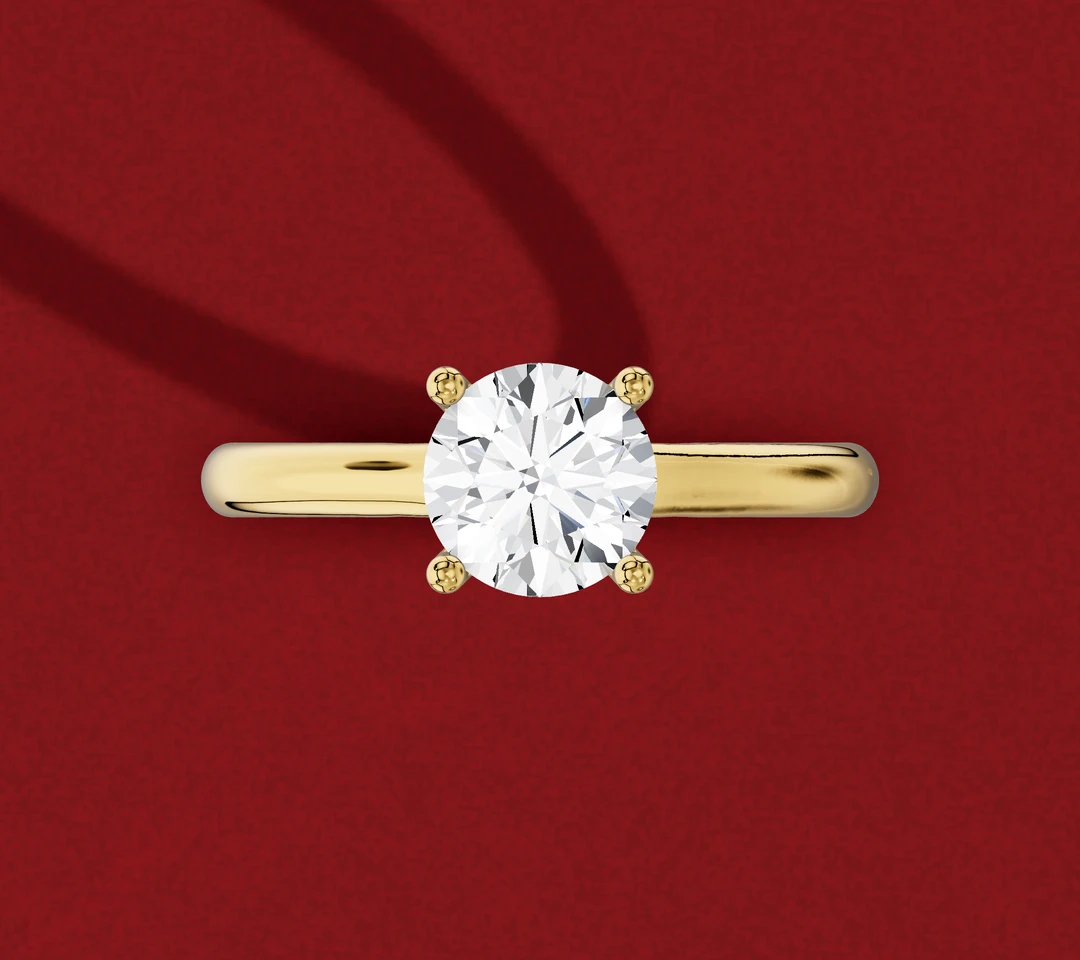
This is also the view for checking the stone's orientation and the positions of visible prong tips. For a design with small stones, trace where they start and stop rather than judging the band by its brightest reflections.
Write down the detail you like. "I like the band narrowing towards the centre" gives the designer something specific to preserve.
Through the finger opening: how does the band rise?
Now look through the circular opening where your finger would go. Follow the same shoulder again. You can see its rise towards the head and the space beneath the centre setting.
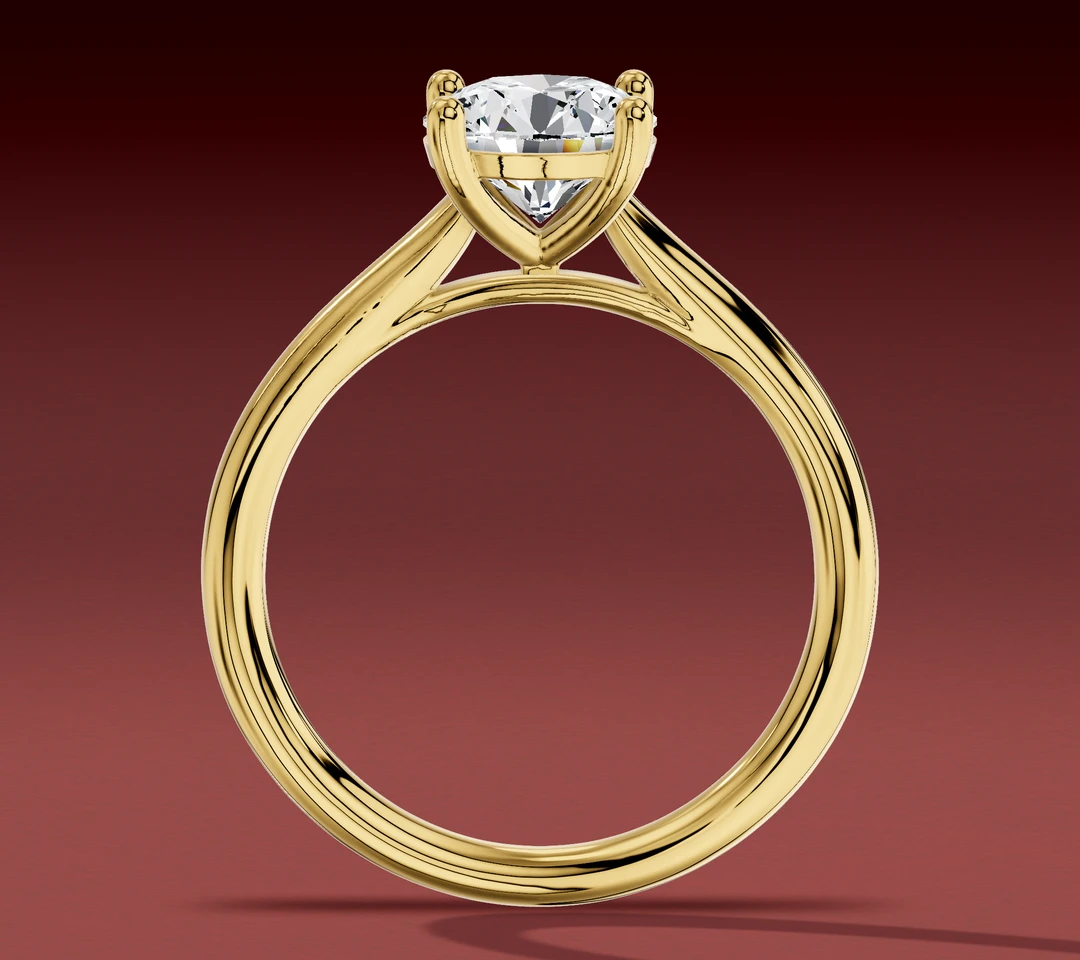
In our example, the shoulders rise on either side. That feature is much clearer here than from above. If you are choosing that construction, our cathedral and non-cathedral comparison explores it separately.
For height, ask for a dimension with its starting and ending points marked. A number labelled only "height" could leave you wondering whether it describes the entire ring or the part above the finger. Ask the designer to show exactly what they mean.
Edge-on to the finger opening: what projects beside the band?
Turn a quarter-turn from the previous view so the finger opening is edge-on. This reveals another side of the head and the metal projecting to either side of the shank.
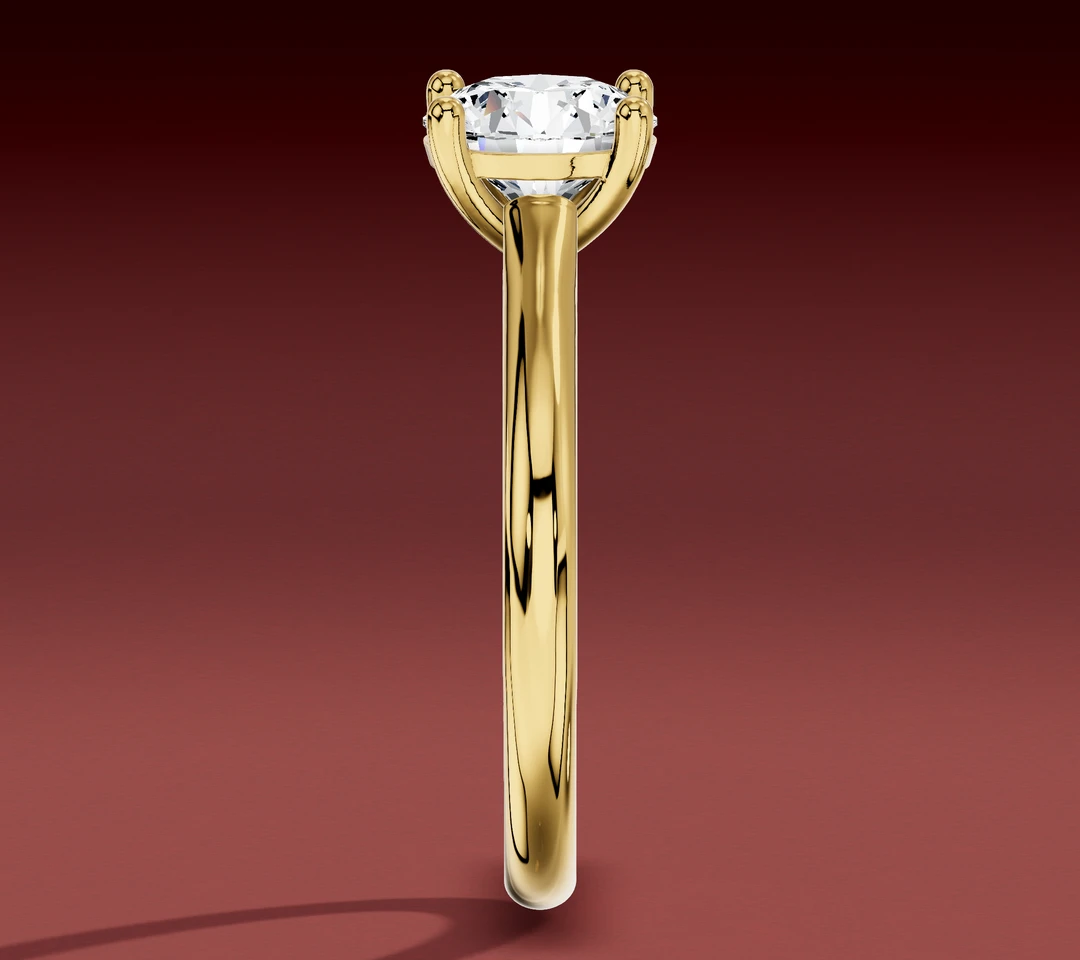
If a wedding band will sit beside the engagement ring, this is a useful place to start that conversation. Ask to see the intended pair together, with the wedding band's actual dimensions. The separate wedding-band fit guide covers gaps and possible changes.
An angled beauty view can help you understand how these surfaces join. Keep the straight-on views beside it so reflections and perspective do not become your only reference.
"Make the band finer" can mean two different changes
Band width runs across the band, along the finger. Thickness runs from its inner surface to its outer surface. They describe different directions.
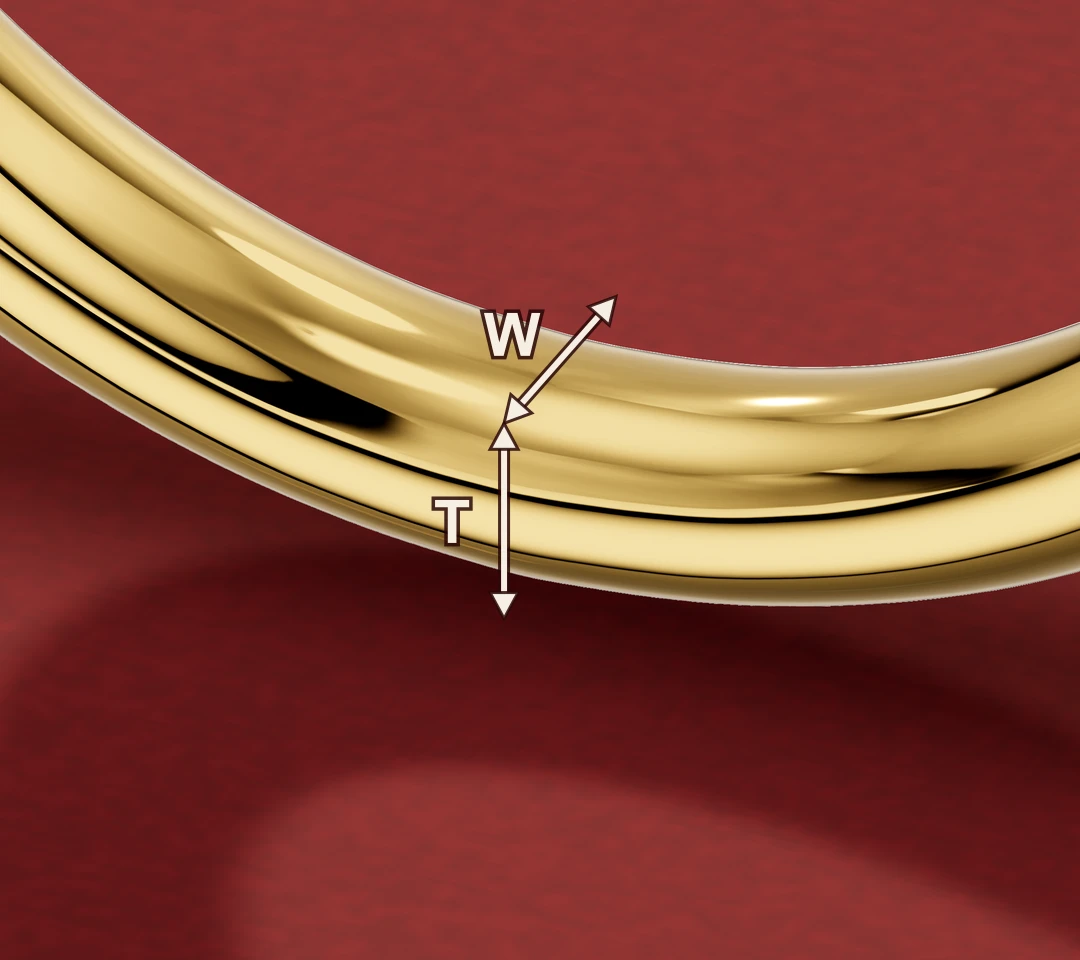
Open the same band detail without arrows.
If you like the outline from above but the side looks heavy, say that. Asking for a "thinner band" leaves the designer to guess which dimension you want changed.
Also identify the location. A measurement at the bottom of the band does not describe a tapered shoulder. Ask which dimensions refer to the finished ring, and have the designer explain any difference between those and the production model.
A clear note might be: "Please keep the shoulder width seen from above. In the view through the finger opening, I would like to discuss a less full shoulder profile. Which dimension would change?"
That asks for a design discussion without prescribing a structural alteration yourself.
Turn a screenshot into useful feedback
Circle one feature on the image and give it a number. Then write one sentence explaining the preference or question. Keep the unmarked image as well, so your annotation does not hide the detail.
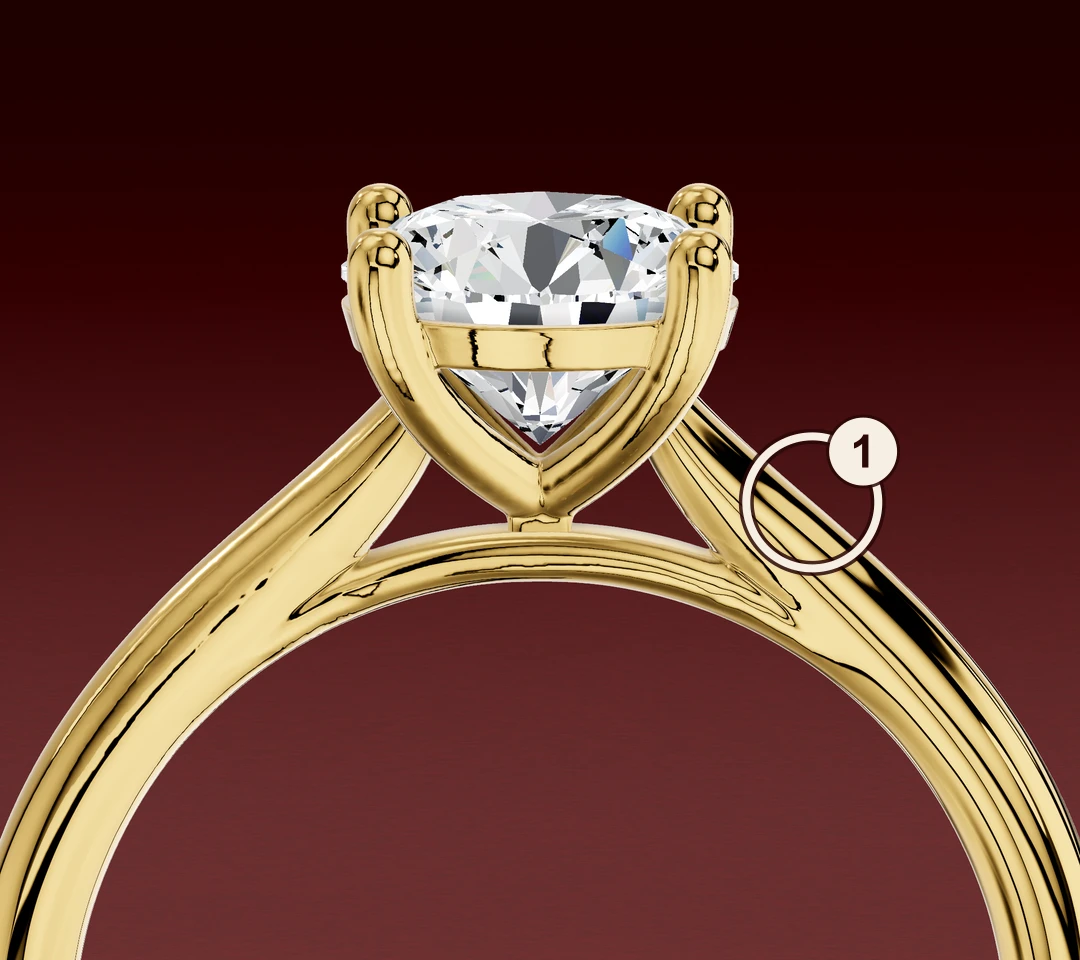
Keep the unmarked version beside your feedback.
For the shoulder marked here, a useful question is: "Could this curve meet the head more gradually while keeping the top-view outline?"
For a stone detail, you might ask: "Is this the shape of the finished prong tip, or a production-stage representation?" If you cannot see a feature clearly, request another view before requesting a change.
When revised images arrive, compare the same view at a similar scale. Check both the requested change and the feature you wanted to keep. Save the revision name or date with your comments so an older favourite does not get mistaken for the approved version.
Put the answers beside the pictures
Before approving the design, keep a short written record of:
- The revision you are reviewing and the ring size, including its sizing system
- The selected stone and its measurements, or a clear note that the model still uses a placeholder
- Metal and finish, plus any engraving
- The agreed band measurements and setting-height reference points
- Answers to your marked-up questions, including any wedding-band requirement
Use the pictures to settle the design you want. Ask the jeweller to confirm construction and the finished-ring checks: a render cannot establish comfort, stone security or the light performance of your actual diamond.
If you are working through a Lily Dia design, send your numbered questions online. For the stages around this review, see our custom engagement ring guide.
Designed by us in Melbourne, made to order
Lily Dia is a small studio, so every ring is drawn, set and finished for the person wearing it. If this article helped, the collection shows how these choices look on real rings, and you can ask us anything before you decide.
Browse engagement ringsOr ask us a question first