


A pinched shank narrows at particular points, often close to the centre stone. A straight shank has a more even outline. Look at the upper band beside the stone, then compare how its two edges approach the head.
The shoulders are the parts of the band that approach the head, while the shank wraps around your finger. GIA's setting guide explains these parts. Here, we focus on the shape of the shoulders and how to describe the line you like.
The two examples use plain bands and the same round centre stone and head, so you can concentrate on the band outline.
Start with a slightly angled view
Looking straight down can place the wider lower arc of the band behind the upper shoulder, making their outlines overlap. These slightly angled views separate the two. Follow the upper strip leading into the head; the lower arc is another part of the ring.
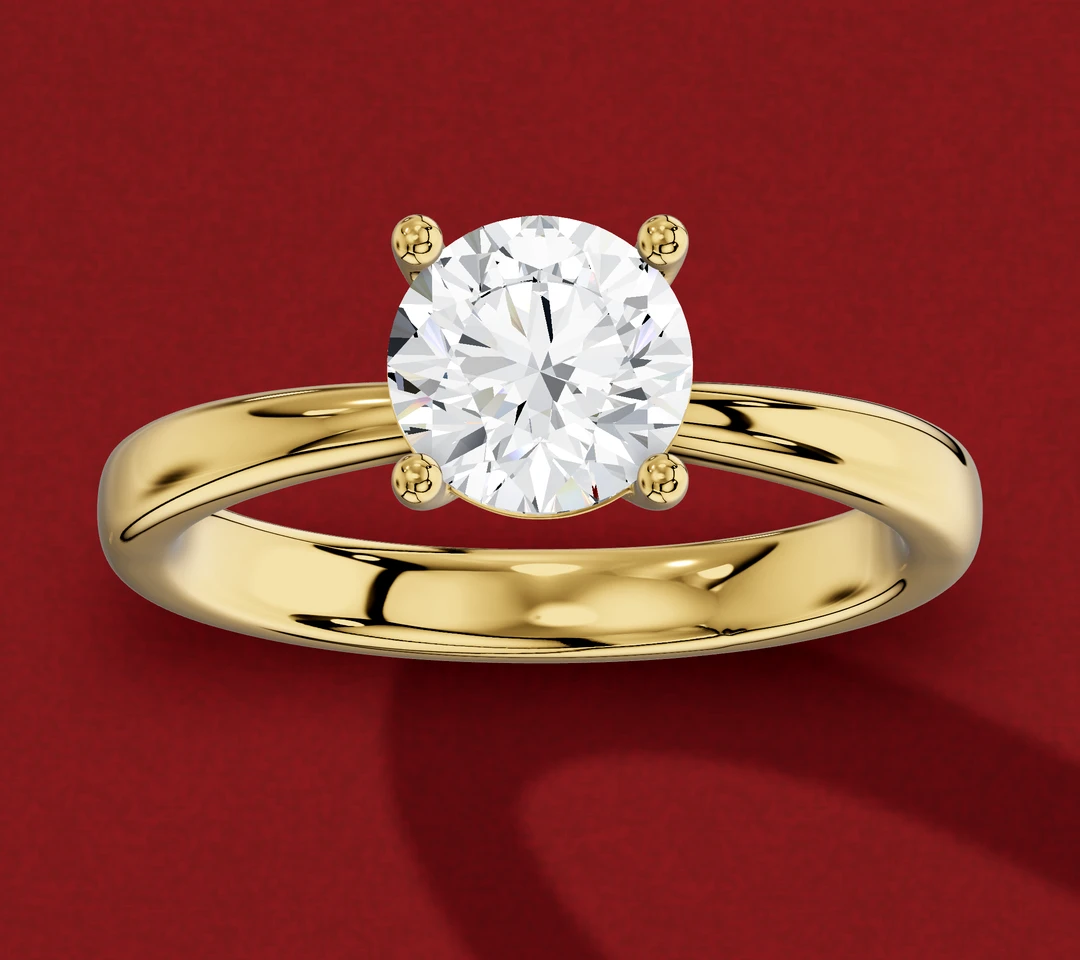
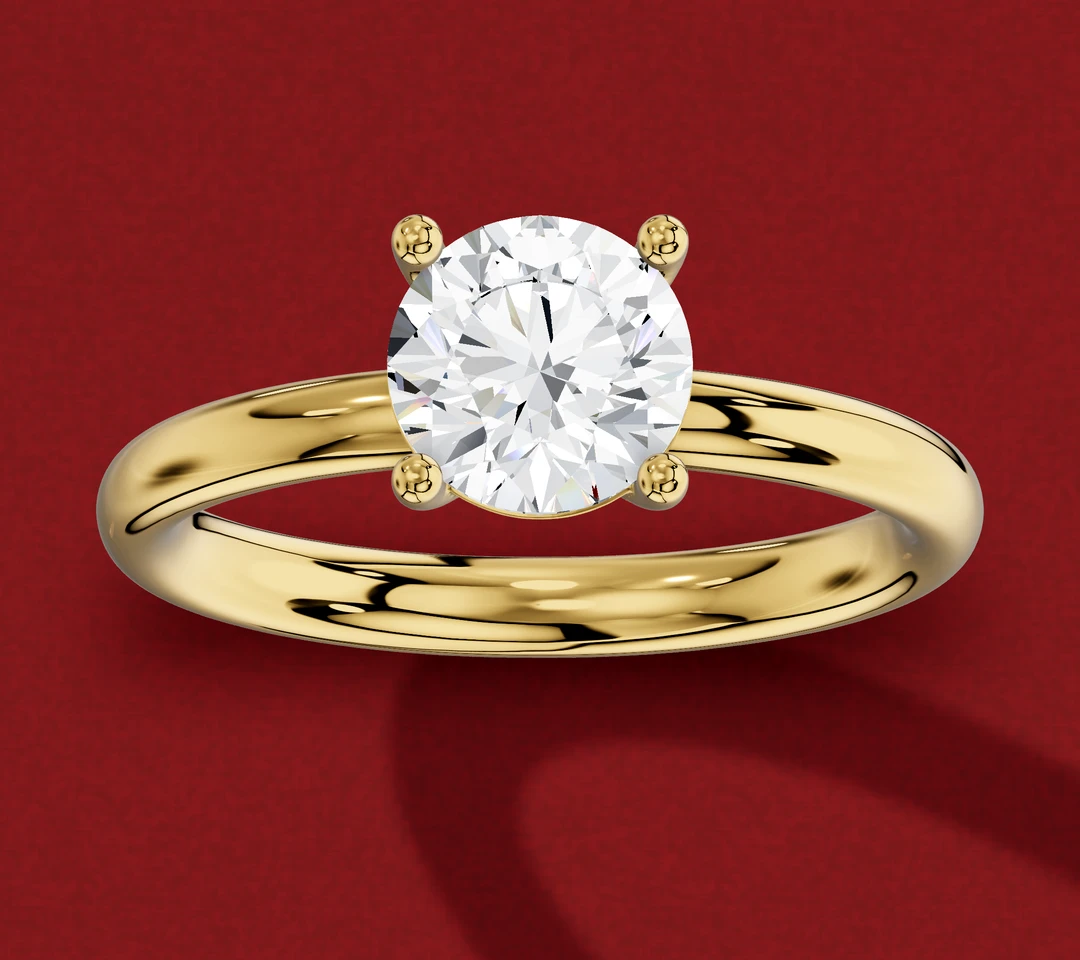
Choose the pinched outline if you like the inward sweep of the upper shoulder leading into the stone. Choose the straight outline if you prefer a more even-looking shoulder. Both keep the simplicity of a plain solitaire; the difference is in the transition towards the centre.
Look closely at where the width changes
In both close-ups, A is nearer the stone on the left and B is farther down the upper shoulder. The marks meet the visible upper-band edges. The pinched strip is narrower at A than at B; the straight strip has a comparatively even outline at those positions. Keep the separate lower arc out of that comparison.
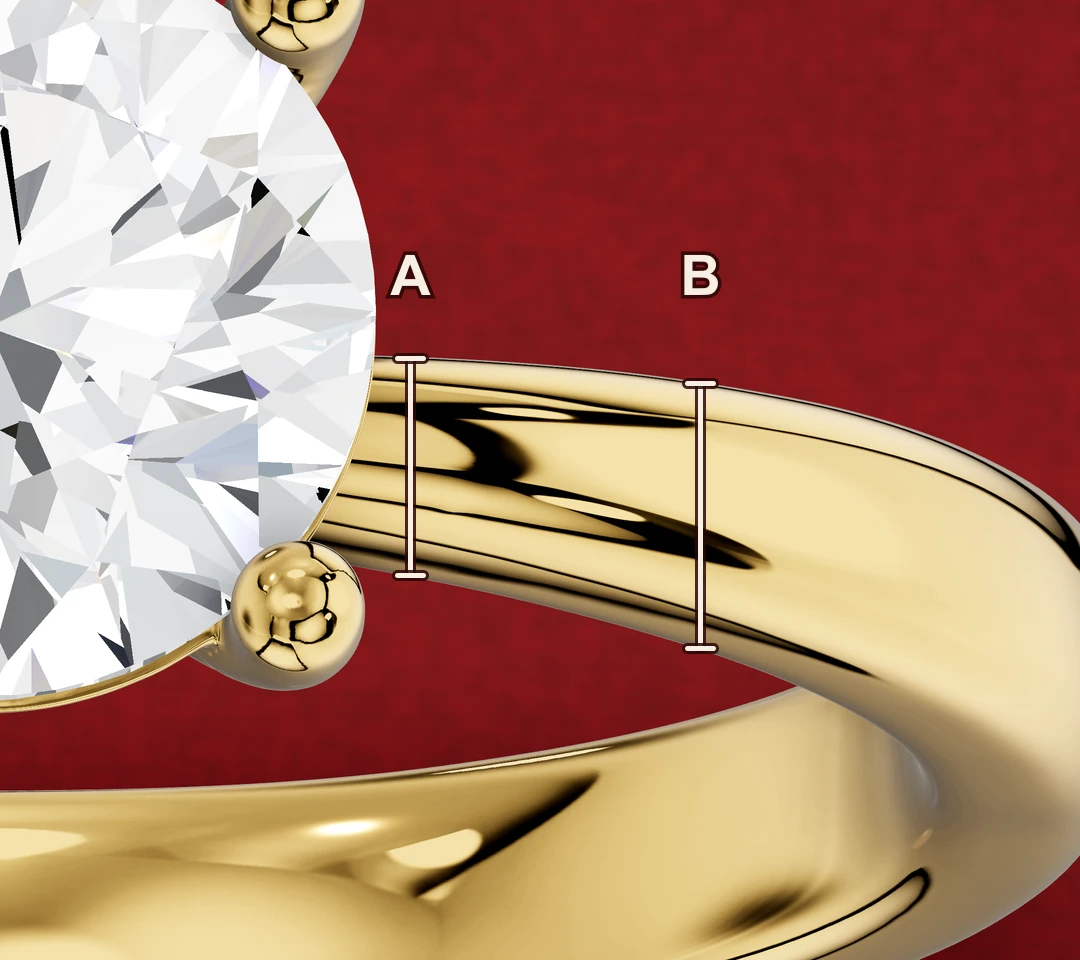
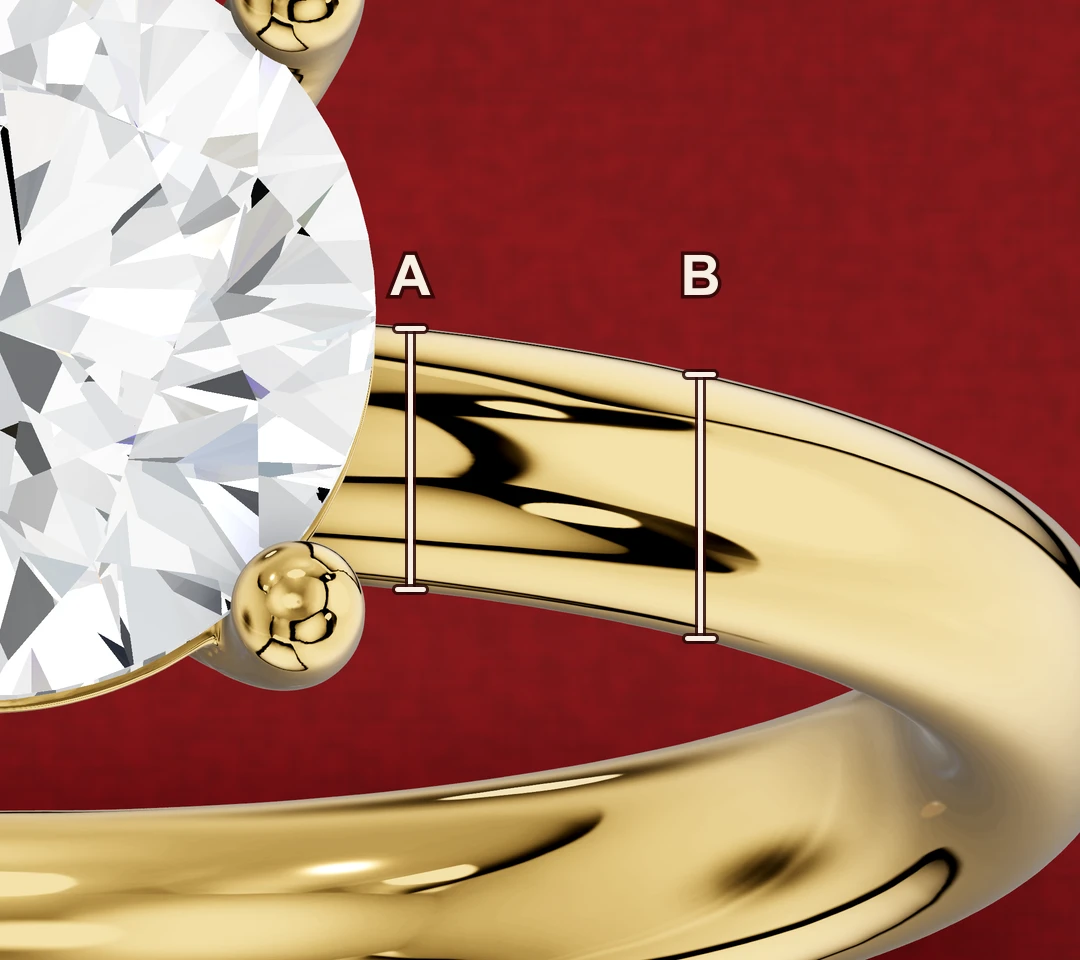
The marks show projected spans of the visible strip, rather than sizing measurements. The angle and curved band also affect its apparent outline. A close-up helps you describe where the narrowing begins and how abruptly the edges curve inward. A short pinch close to the head has a different outline from a gradual narrowing farther down the shoulder.
Width is the distance across the band. Thickness is its depth from the inner surface to the outer surface. These views do not give you the complete cross-section. If you want a particular shoulder shape, ask for the width at its narrowest point as well as the band thickness there.
Pinched, tapered or reverse tapered?
These labels can lead to different pictures. Automic Gold's terminology guide uses "pinched" for local narrowing, usually near the stone. Borsheims' ring anatomy guide calls a band that narrows towards the centre stone "reverse tapered".
For your own design, a description and a marked image are especially useful. Say "I like the band narrowing just beside the centre stone", then point to the area you mean. That makes both the direction and the location clear. Our CAD-reading guide helps you identify the views and mark that feedback.
Put your preference into words
You could start with one of these:
- "I like a small pinch beside the centre stone, with a fuller band farther down."
- "I prefer an even-looking shoulder without an inward sweep."
- "I like the narrowing, but would like to compare a shorter and a longer transition."
Explore our round engagement rings, or send Lily Dia the outline you like. A close-up with the shoulder marked is a useful starting point for the conversation.
Designed by us in Melbourne, made to order
Lily Dia is a small studio, so every ring is drawn, set and finished for the person wearing it. If this article helped, the collection shows how these choices look on real rings, and you can ask us anything before you decide.
Browse engagement ringsOr ask us a question first